After building our barn, we chose to do the stall build inside the barn, ourselves. I tried looking into pre-made stalls, or custom made stalls since I wanted larger than normal stalls. The quote I got back for a company building stall fronts and sides for our layout was $12,000 +, and I just could not stomach that after paying to have our barn built.

I did a lot of research online and settled on building our own stalls from 2x6s. They are pretty sturdy for horses and cheaper than purchased stalls. Once we decided on the size of our barn, I started experimenting with different stall sizes and configurations to go inside our barn size (24×48). I wanted the horses to have the biggest stalls possible, and a comfortable aisle that a horse and handler would fit in.
My barn builder put in doorways to the outside of the barn for each stall I intended to build. We had the barn built in March of 2020, but we only just finished the remaining two (but left it as one large stall) stalls. Since we only had two horses, we didn’t ever finish out the other part of the barn.
But now we have a new horse coming, so we had to finish out these stalls. A few people asked me how we built our stalls, so here goes!
Once you have the size of the barn or the space you want stalls, mark it out on paper to determine the stall sizes you will build. Draw this out on paper to decide how big your stalls will be and where you will need posts to anchor your stalls. I’ll be honest that I did this probably 20 times over, moving the walls and walkways around to get a configuration I liked. I think this brainstorming is helpful so you can settle on a layout you want.
If possible, use the sizes that lumber already comes in (sometimes this is not possible, and that’s ok, but make your life easier when possible).
Here’s a rough drawing of my barn:
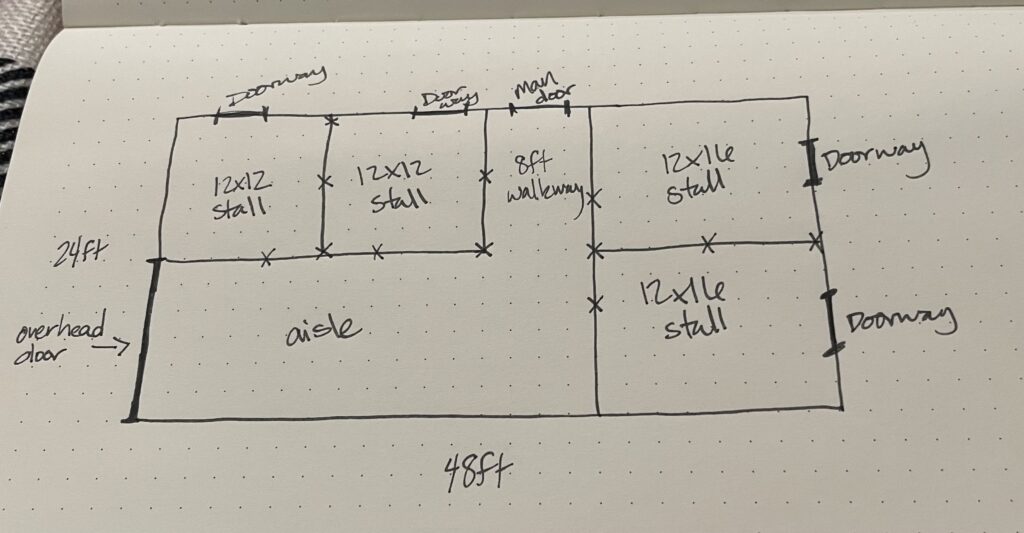
I decided on 2 approximately 12×16 stalls, and two 12×12 stalls. So I drew out these sizes. Make sure you leave enough room for stalls doors and aisleways to cross tie your horse if need be. I opted for a 12 ft aisle and an 8 ft walkway for us into the barn via a man door access (we can store blankets, feed, etc in this area too).
In my drawing above, I put x’s where I needed to place posts.
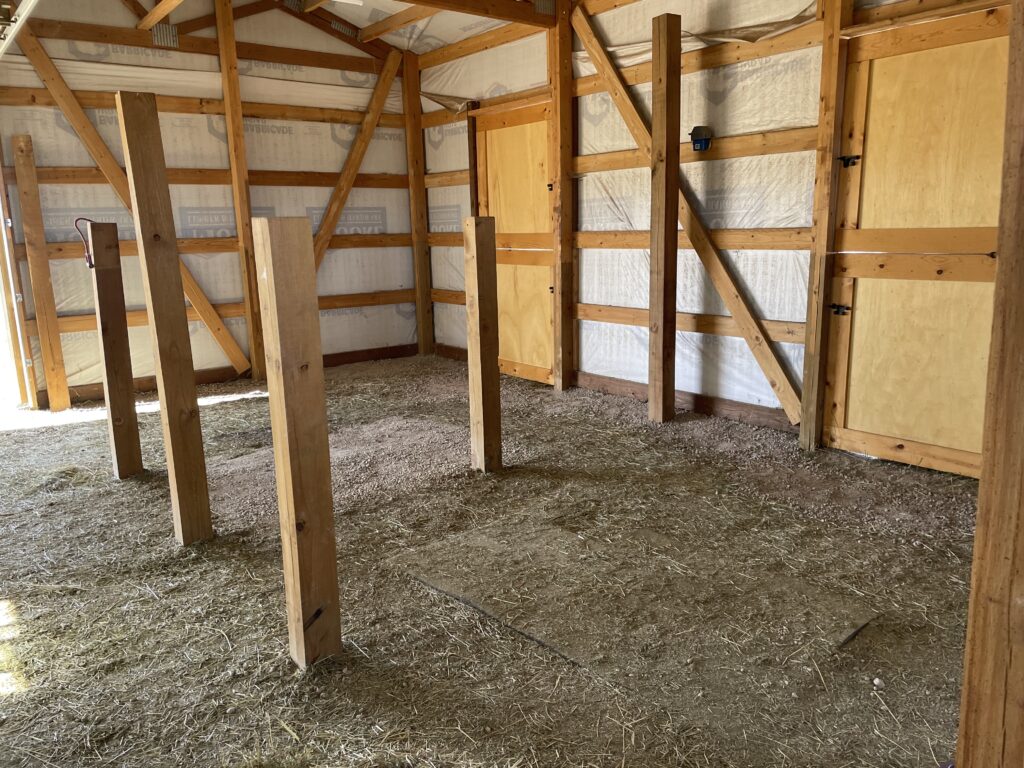
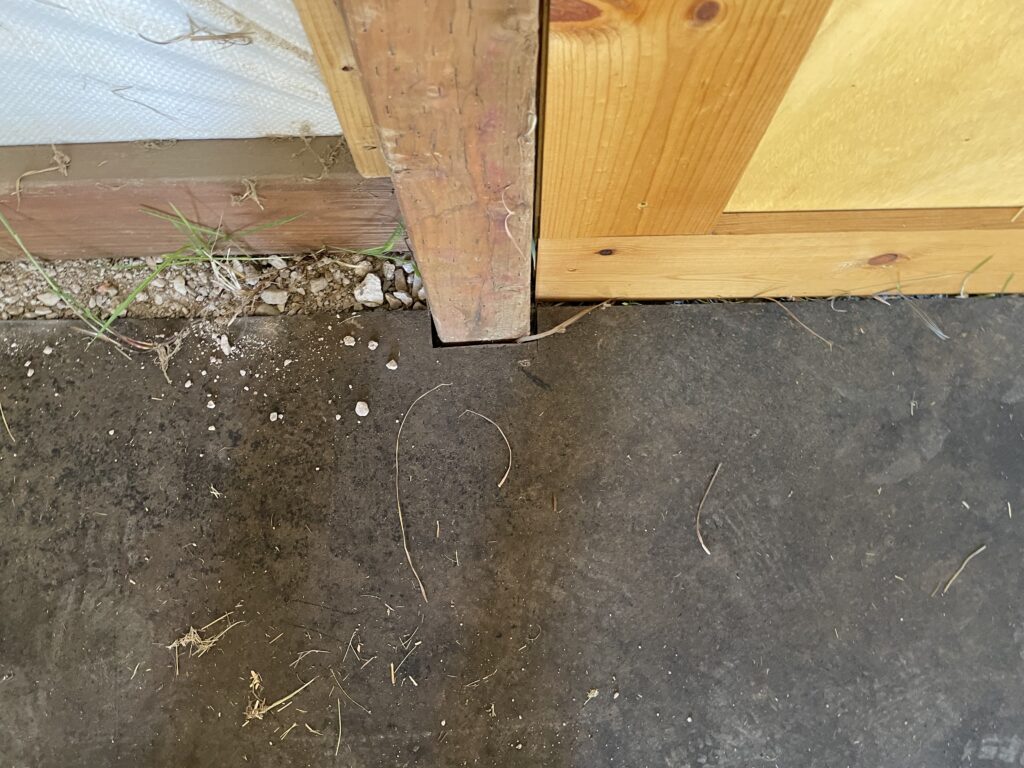
Once I knew my stall sizes, I marked where I would need posts installed to construct these stalls. Then I asked my barn builder to dig holes with his skidsteer where I wanted these posts. It was tight inside the barn but doable. **NOTE: Don’t install a cement floor if you are wanting to use this method of building stalls. Or at least wait until you’ve installed your posts.
We were able to utilize the pole barn posts for some of our stall wall construction as well.
Now that you have holes in the ground, you will need posts to support the walls you intend to build. The size of your wall posts will also determine what size posts you use. We used 6x6s. The height varied based on whether it was a stall front or side wall (we used 8 ft long boards for the stall fronts and some side walls, while we used 12 ft long for the tall side walls or shared walls that we wanted to separate the horses.
Set your posts level and square (we could go into this further but I’ll just say use a level and string between posts to make sure you do this!)
We didn’t want to span further than 8 feet without a post.
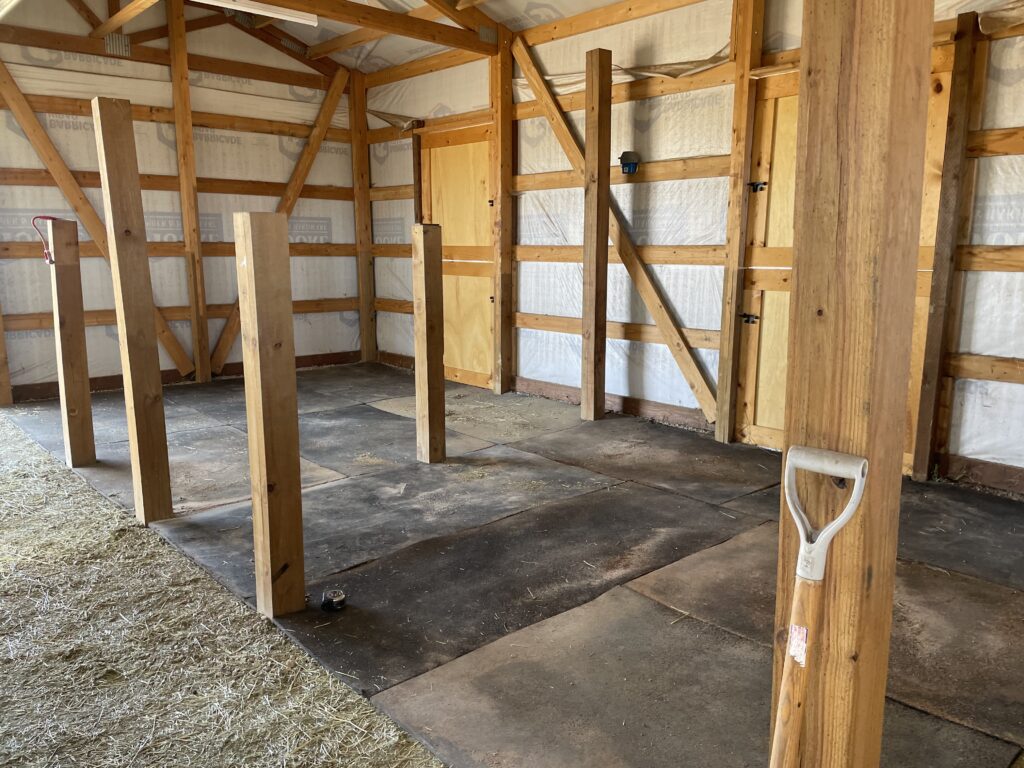
Now that your posts are in the ground, the barn looks a little something like this:
Oh, also an important note, we built our own stall doors and while we wanted approximately 4 ft wide doors, we were ok with a bit of variation in door size since these were custom built by us.
Check out this post to build your own Dutch Stall Doors.
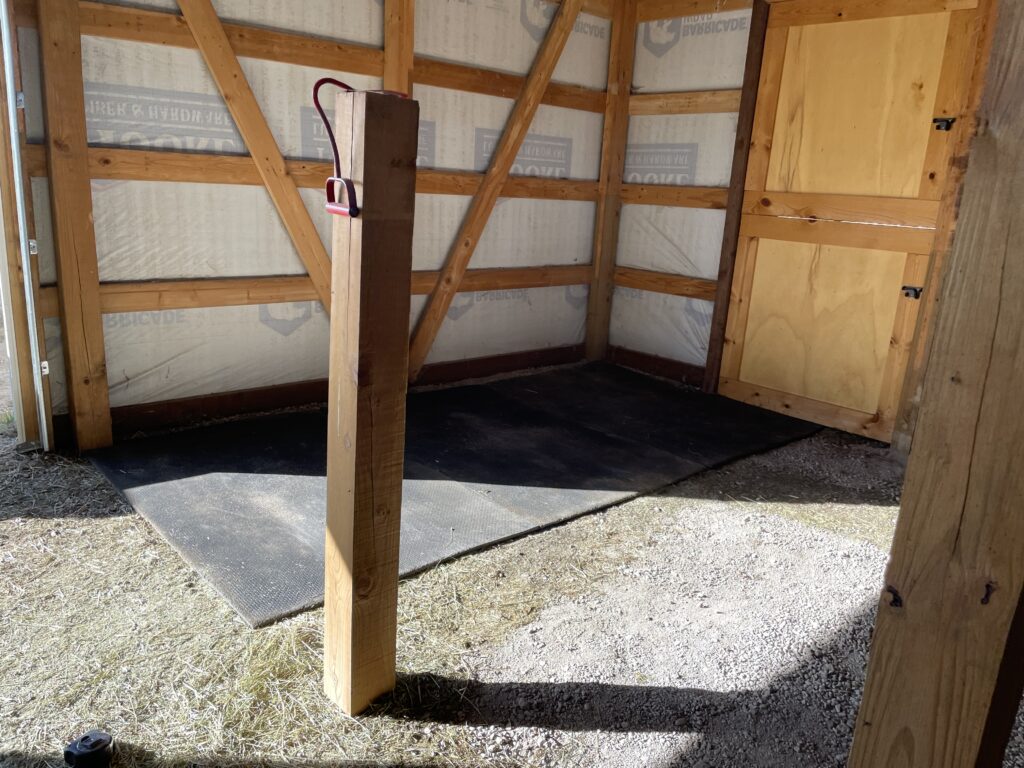
Once our posts were in, we laid down crushed concrete (also sometimes called road base). In the above photo, the crushed concrete is installed but has hay sitting on it – you’ll notice the material is clearer where we moved a mat off and at the edges where we filled in with some spots that sunk along the edges.
Level and compact whatever material is on the ground of your barn and then you’ll need to cut stall mats to fit the space you have. We had stall mats left behind at our property and also moved mats we had previously bought for our horse at a boarding facility. We thankfully didn’t need to purchase any stall mats – this saved a lot of money! We had to fit them in like a puzzle and cut them to size however.
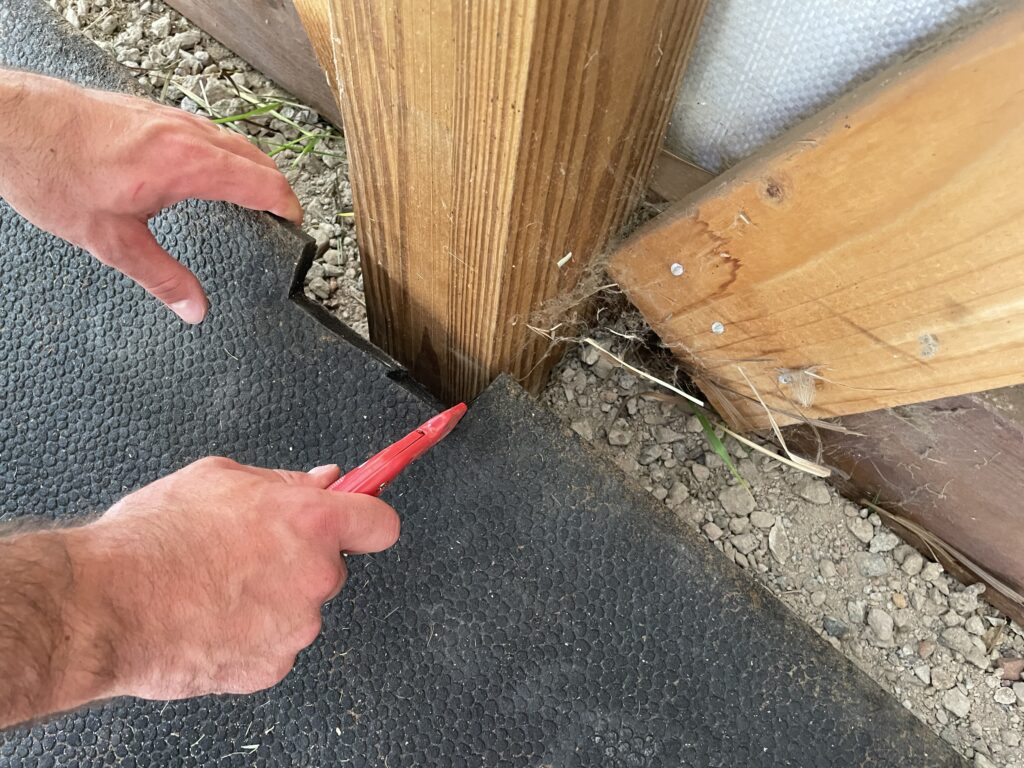
What is the best way to cut stall mats?
Since we’ve done a lot of mat cutting in our other stalls, we tried multiple methods. The best thing we found was a “professional” carpet knife. Buy the carpet knife and the pack of additional blades. This carpet knife only costs $6.99. *It is very important that you change the blade on every few feet of cutting*. Sounds crazy, but that is key to this not being the most frustrating task ever. A pack of 10 blades only costs a couple dollars and they are easy enough to switch. If you try to do a whole stall with one blade, you will rip your hair out. Just change the blade as soon as it is difficult to cut, you won’t regret changing the blade more often.
Continue to cut mats to size until they fit in your desired stall size. We found this easier to do before putting in the stall walls, but you could always install the stall walls first if you prefer.
Here are what our mats looked like once installed:
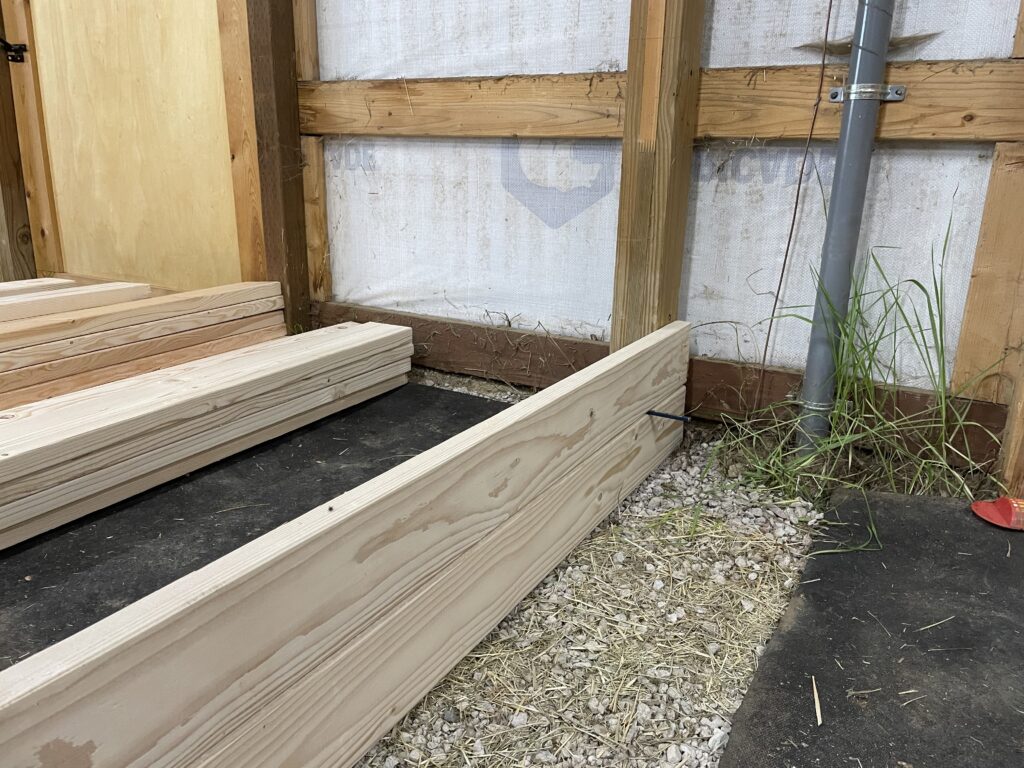
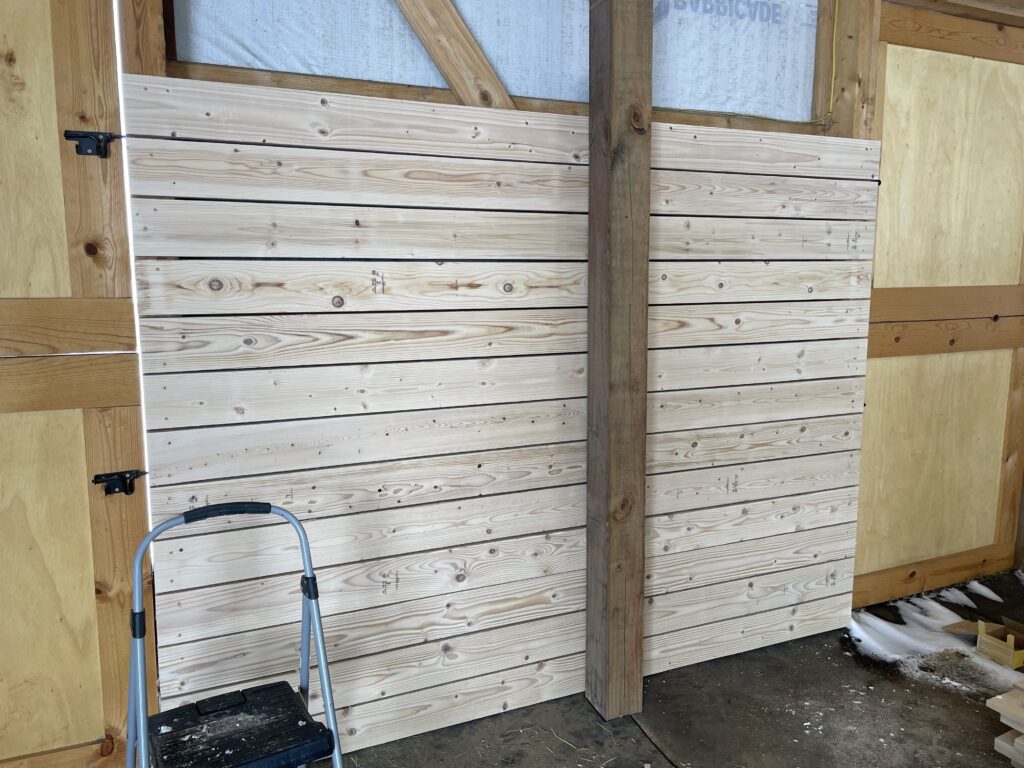
With the posts in place, measure the size of your stall wall boards. You’ll need to purchase enough 2x6s to go up as high as you want. You can build the walls all the way up the side of the barn, but that will cost you more money. We opted to go 7-8 ft up because we are hoping that is enough to avoid any rouge horse hooves that go flying or a rolling horse in a stall.
Once you have purchased the 2x6s for the stall wall sizes you will need, you need to start putting up the walls. Make sure you start the bottom board as close to the bottom as you want and make sure it is level. I wanted a small gap, but nothing a horse hoof could fit through.
We had two people, so one could check the level and hold one side of the board, while the other helped level the board on the opposite side and then put in the first screw. We found that we only needed to put in one screw into each board (usually the top screw) and then move to the next board. This allowed us to move more quickly, and putting in the second screw into each board was an easy task that I could go back and do the following day at my leisure.
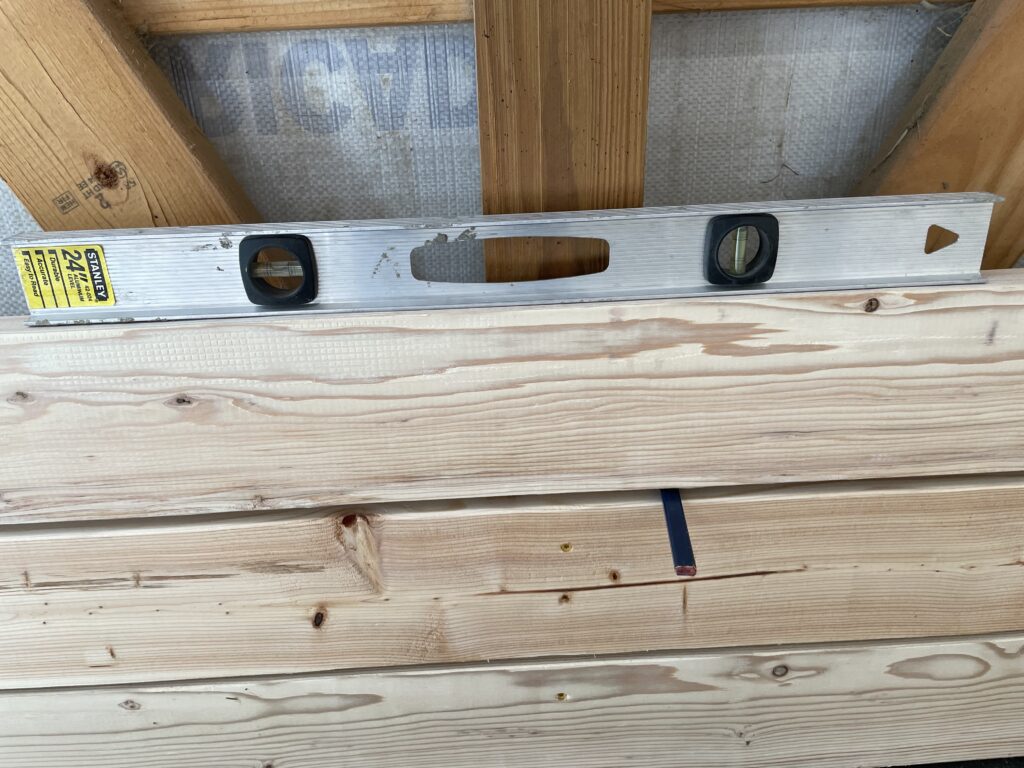
We used carpenter pencils between each board. This allows you to pull out a board if it needs to be replaced without having to redo the entire wall. And it probably saves you a board’s worth of wood in the end having the spaces. I also just like how it looks with the small spaces between each wall board. Continue placing boards and using the level up each wall as high as you’d like it.
Think about the walls before you put them in and make sure you can screw in the screws you need to before putting up a wall that goes in front of it. (ie make sure you can finish the screws that you need to before moving on to the next wall – this is important where two walls meet each other).
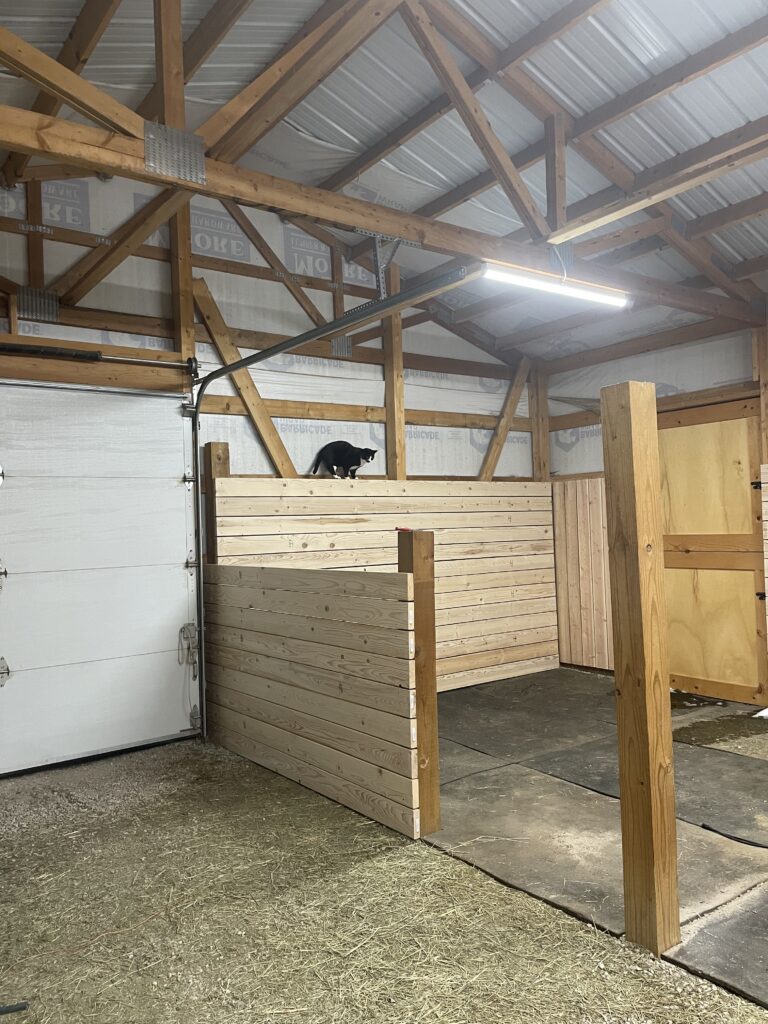
On the back walls of the stalls, we put in a middle post to divide the stall, but left enough room for a wall of 2x6s to go behind our post. This photo illustrates what I mean – note the 2x6s can rest behind the post that holds up the dividing wall between the horses.
Another thing I didn’t do that I think I maybe should do is to put a pressure treated rail as the bottom board, it can protect that board from rotting out due to moisture that the horse brings in as well as urine that may be up against the walls.
I didn’t do this in my original two stalls, and the very bottom part of the bottom rail of my mare’s stall is softening a bit, but is still intact. It probably isn’t a big deal, by may save you from replacing it later.
Continue to install your 2x6s until you have all the walls complete.
Depending on how your posts and walls go, you can also vertically mount 2x6s on the walls. We did this where we didn’t have posts to put rails into on each side. See the next photo if this post if the description doesn’t make sense. We used 2 inch screws on these vertical pieces since they are going into the 2x6s that hold the barn together. We put in the walls first, then built and installed our Dutch Stall Doors.
Here is what the stalls looked like once the walls were up, but no doors yet:
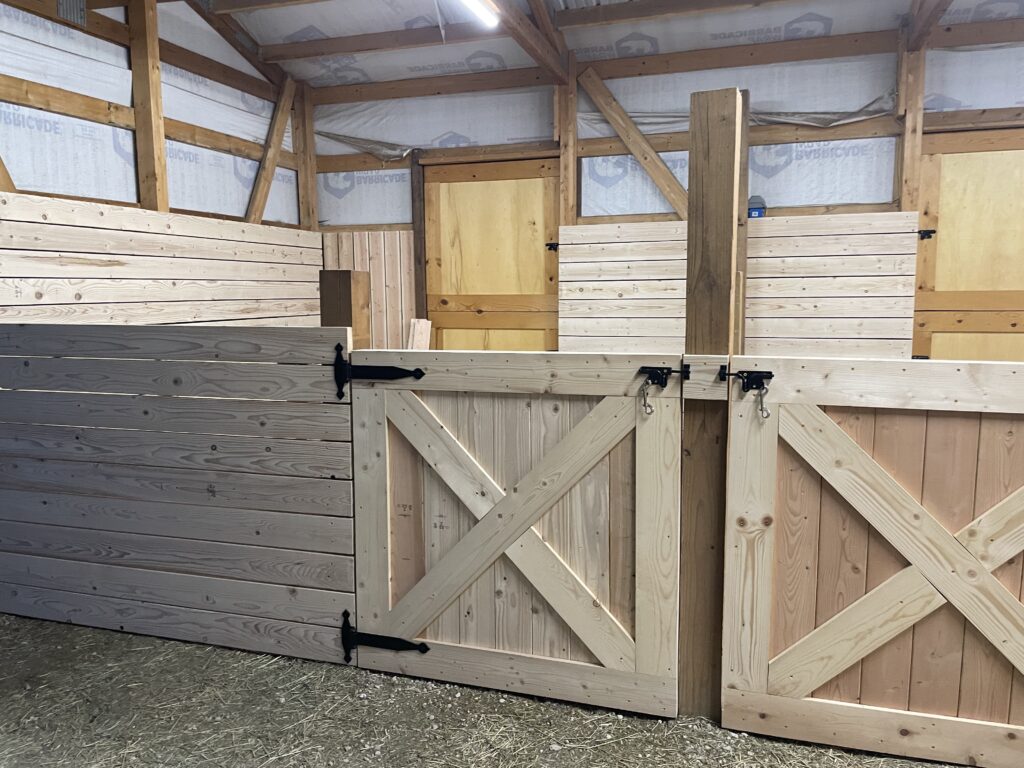
Now that the stall walls are up, you can measure and build the stall doors. Here is my full dutch stall door tutorial.
In the 3 years these 6×6 posts have been sitting installed in the barn, they had twisted and bent a little (I assume without something holding them they just do that, we don’t have a lot of moisture or anything). So the doors didn’t line up absolutely perfectly. But they still look amazing.
Here is our most recent stall build completed with doors installed:
You may be wondering how much building your own stalls costs vs buying pre-made stall fronts.
In Google searches, stall fronts (only the front of the stalls) range from $900-$4,000+. Many stall fronts come as a “kit” which you still need to buy wood for. And you’ll have to install the stall front or pay someone to do it. Typically these don’t even include stall walls (you will still need to construct those yourself or pay for them to be shipped to you pre-made.)
How much does it cost to build your own horse stalls?
We saved a significant amount of money by building these stalls ourselves.
Here is a summary of the stall building cost for our barn. I will include the total cost for all 4 stalls (2 are 12x16ft and 1 is currently 12x24ft, but can be made into two 12x12s if/when needed).
The only labor we didn’t do ourselves for the stall build was digging post holes which cost us $200.
- 6x6x8s (Quantity 6) $231.72
- 6x6x12 (Quantity 4) $209.52
- Quickcrete to set the posts $45.20
- Dutch Stall Doors (Quantity 4) See full DIY Dutch Stall Door tutorial here. $217.20
- 2x6x8 (Quantity 45) $356.40
- 2x6x16 (Quantity 39) $570.96
- 2x6x10 (Quantity 26) $236.08
- 2x6x12 (Quantity 12) $130.56
- Deck screws (I liked how tan looked with the wood) $39.52
- Hinges and door latches (4 dutch doors) $249.76
We also bought a load of road base to put as the flooring beneath our stall mats, which was $495.00
These are the full prices of these materials as of November 2023, I almost always buy a Lowe’s coupon on Ebay before going shopping to save a minimum of 10%. We also built the first two stalls in early 2020 when prices for lumber were a bit lower, but I wanted to give you the total cost as of the writing this post.
Total cost to build 4 stalls: $2,981.92. Cost per stall was $745.48.
Compare that to a minimum of $900 for ONLY A STALL FRONT, and we saved a significant amount of money by doing the work ourselves as well as designing our own custom stalls. I love the look and functionality of our stalls. If you have any questions about our build, please let me know!
Leave a Reply